
Despite being right in the middle of the Rio SUMMER Olympics, we only have 2.5 months left to Halloween! That means it is time to start planning our 2017 Star Wars costumes! Before I get started on this year’s however, as promised, here is the instructions for #1’s C-3PO from last fall.
A quick reminder, we made the R2-D2 costume a few years back when our daughter was younger, and it fit our son perfectly last fall. As you can imagine, choosing #1’s new costume was a no brainer. Here they are in the classic droid pose 🙂

Movie screen shot © LucasFilm Ltd. via http://www.mirror.co.uk
If you want to see more pictures from the photo shoot, check these 2 posts out:
These ARE the droids I was looking for!
Happy Halloween!
UPDATE: We have finally posted the R2-D2 costume too. You can find the instructions here!
One more thing before we dive in, if you want to see a close up of any of the photos, just click it.

Here you can see how the neck piece tucks into the shirt, and how I used gold Duct Tape to close up the back slit in the shirt.


Close-up of the 2 chest plates. Also, you can see that the upper arm pieces are not attached to the shirt, and the thigh pieces are not attached to anything at all.
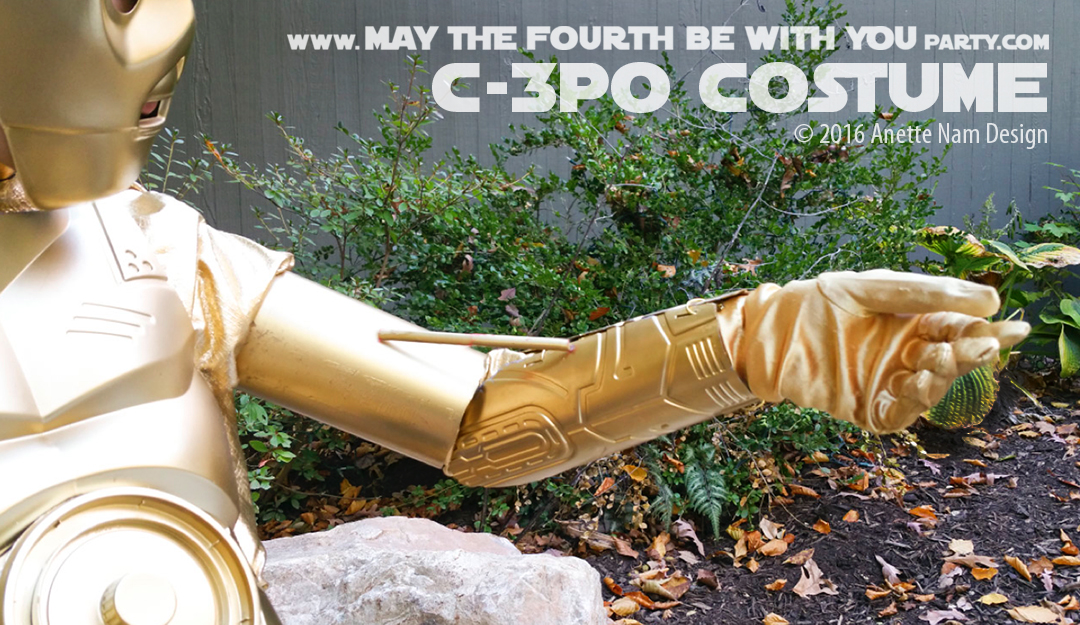
This shows how the straws and gold elastic connect to the upper arm piece and the forearm guards. When my daughter stretched her arms out more, you could easily see the gold elastic threaded through the straws.
Needed:
- Gold Fabric
- Black T-shirt
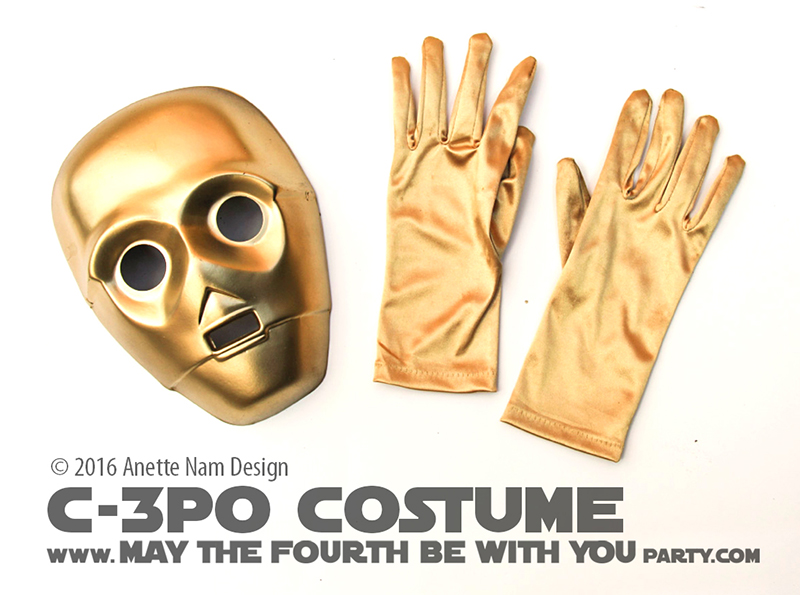
- C-3PO Mask
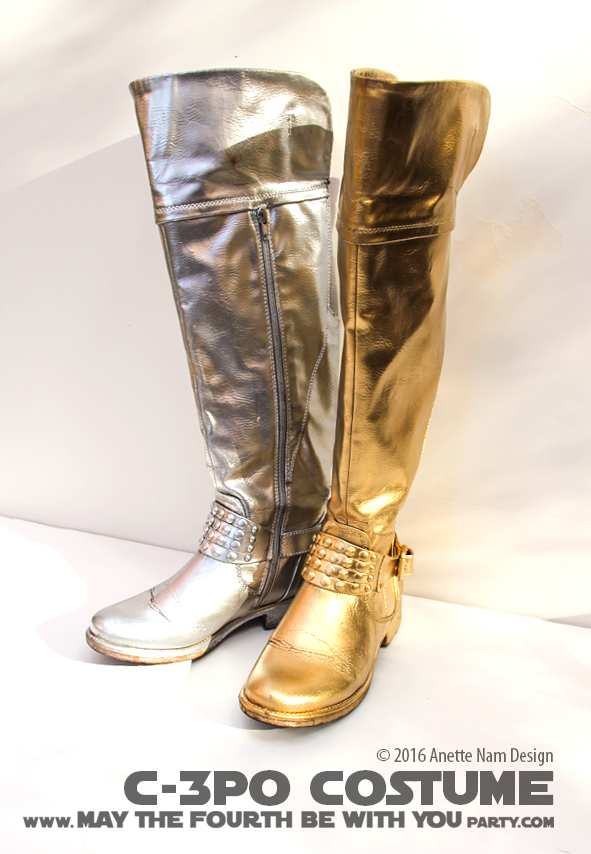
- Tall Boots
- Gold Satin Gloves
- 2 Plastic Knight/Robot Chest Plate
(I bought ours at the local Dollar Tree) - 2 Pairs of Knight Forearm Guards
(I bought ours at the local Dollar Tree)
- Lots and Lots of Elastic Hairbands (or ribbons)
- 4, 2 Liter Soda Bottles
- 2, 1 Liter Soda Bottles
- 4 Straws
- 2 Large Pieces of 1/4″ Beige Craft Foam
- Assorted Disposal Plastic Items: We used a Cottage Cheese Lid, Yogurt lid, a Soda Bottle Cap, Medicine Measuring Cup, and a Small Rectangular Container
- Gold or Beige Thread
- Black Thread
- Gold Elastic Cord
(2-3 yards)
- 4 Large Beads
- 1/2″ Wide Elastic
- Self-adhesive Velcro Strips
- Gold Duct Tape
- Gold Metallic Spray Paint
- Silver Metallic Spray Paint
- Grey Primer Spray Paint
- Brown Primer Spray Paint
- Temporary Gold Hair Color Spray
- Large sheet of paper
- “Junk” Scissors
- Good Scissors
- Awl
- Sharpie
- Needle
- Sewing Machine
- Glue
- X-acto Knife
- Self-healing Cutting Mat
BASE LAYER:
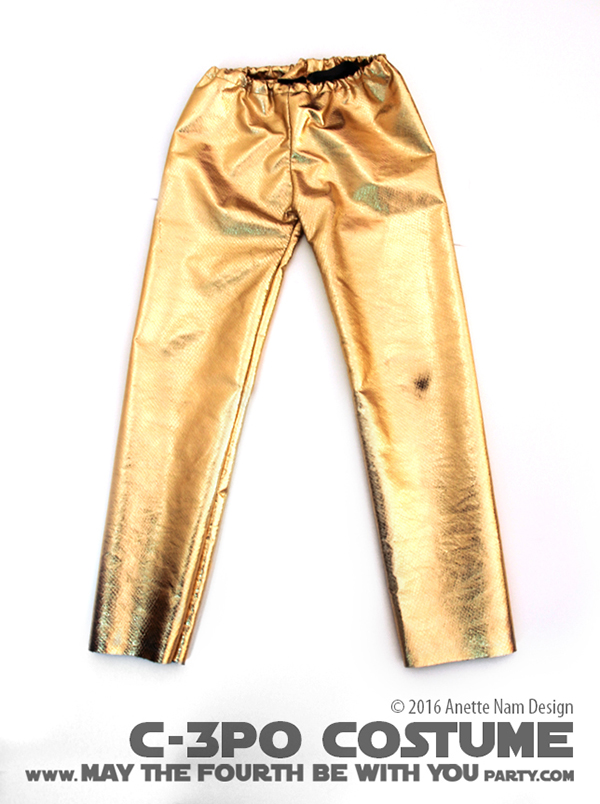
- Start by sewing pants and shirt in the Gold Fabric. I used #1’s clothes and used as patterns. Keep them pretty tight, so they will fit under the armor.
Note that the shirt ends above the belly button. I duct taped the hem after the whole outfit was put together in order to get the exact right length. - Cut the hair bands , so you have long strips. Glue them onto the upper-middle to bottom of the shirt. (Make sure to put newspaper inside the shirt so the glue does not go on the other side. Wait until completely dry, do another section of the shirt. Repeat.
- NOTE: The shirt will get VERY heavy, so be prepared that it will stretch and hang lower than expected.
- Using black thread, sew the hair bands in place at the top, bottom and in the middle. (Since the glue will crack in sections.) I tried doing it on my sewing machine, and it did NOT work. This was by far the most time-consuming part of the costume.
“ARMOR”:
CHEST:

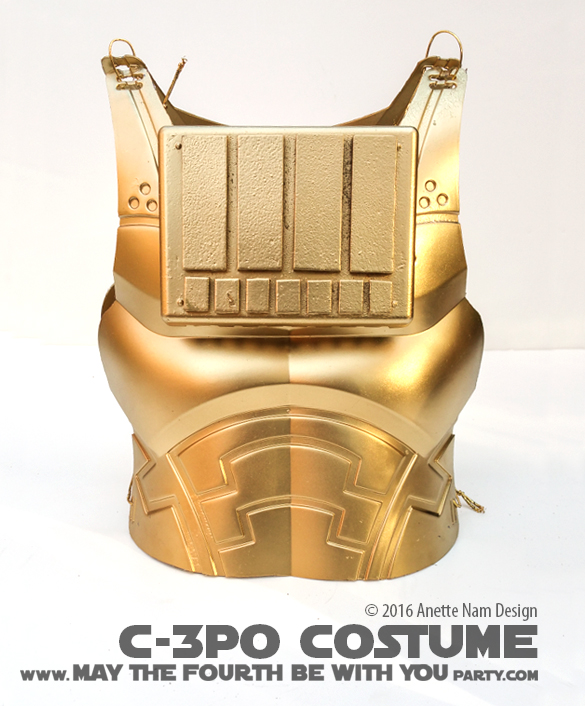
- If needed, shorten the 2 chest plates – they should end at about the belly button. I recommend marking with a sharpie first, then cut with your old scissors. Be careful so the plastic does not crack.
Don’t forget to remove any fabric/string/plastic attached to the plates intended for wearing – you will add your own later. - Glue the small plastic lid in the center of the larger lid. Then glue soda cap in the middle of the mall lid. Let dry.
- Glue large lid in place of the front chest plate. Let dry.
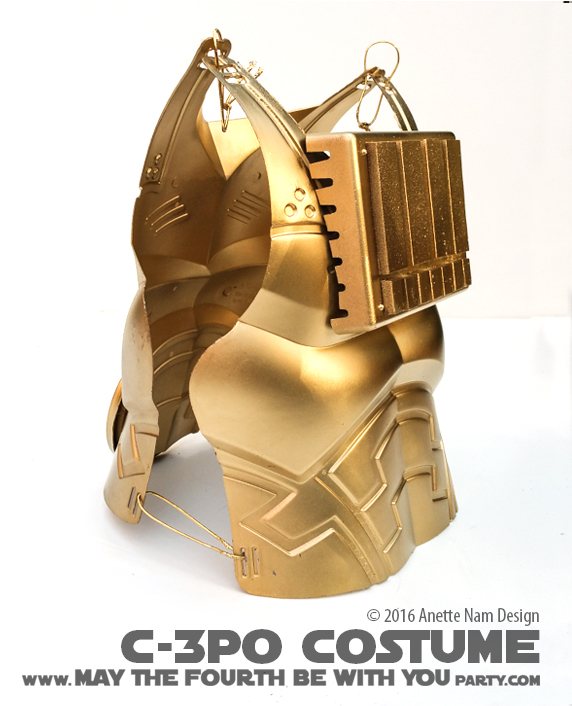
- Cut the sides of the rectangular container so it sits snugly on the armor on the upper back.
- Cut rectangles of craft foam and glue on the bottom of the box.
(I also ended up glueing several strips together and gluing them on the inside of the plastic box. I had a hard time getting the box to stay put on the chest plate, since the glueing surface was so small. Adding the foam underneath greatly increased the surface, and helped everything stay in place. - Let all pieces dry thoroughly. (at least 24 hrs)

ARMS & LEGS:

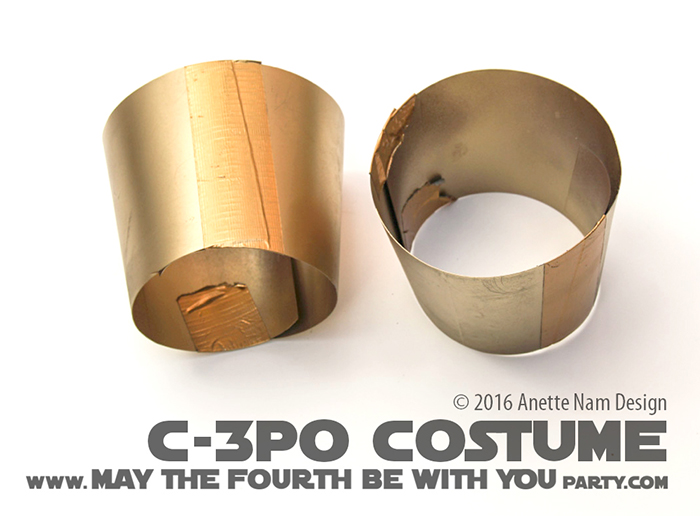
- Cut the top and bottom off, of the 1 and 2 Liter soda bottles using an X-acto knife.
- With 1 cut down the side, cut the 2 Liter bottles into “sheets.”
- Remove any fabric/string/plastic attached to the forearm guards intended for wearing – you will add your own later.
- Using an awl, make the wholes in the upper arm (1 Liter soda bottles) and forearm guards. This is where you will attach the gold elastic and 2 gold straws.
- Cut straws in to about 3″ pieces (size will vary depending on how big you costume is).
Spray paint all the GOLD parts (Brown primer optional). Repeat as needed:
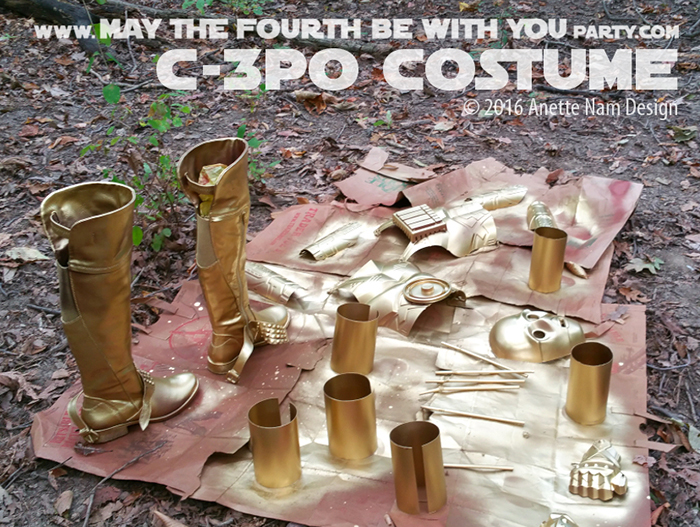
Initially I was going to have both legs gold, but I changed my mind after we painted them. If you check carefully, you can see there are hand guards. They looked too clunky, so we didn’t use them.
- Completed Front and Back chest plates (except the silver com-unit)
- Forearm Guards
- 1 Liter Soda bottles (Arm guards)
- Straws
- Face Mask (you want it to be the same color as all the other pieces)
- 4 Cut 2 Liter Soda Bottles (Thigh guards)
- Left Boot
Spray paint all the SILVER parts (grey primer optional). Repeat as needed:
- Right Boot
- Medicine measuring cup (Com-unit for front chest plate)
Assemble all Parts:
- Connect chest plates with loops of gold elastic. It’s easiest much easier to make adjustments if you do this step while your droid is wearing the pieces.
- Connect the forearm guards with gold elastic loops.
- Tie a large bead to one end of a 10″ pice of gold elastic. Thread it though from the inside in the hole you made in the upper arm piece. Thread 2 pieces of straw on the elastic. Thread the elastic through the hole you made in the forearm guards. Tie off with another bead on the inside. Repeat with the other set. Again, this step is much easier to get “just right” if the droid is wearing the pieces.
- If your droid is still willing to model AND willing to wear all the base layers, take 2 flat-ish pieces made from the 2 Liter soda bottles, hold them up against the thigh and duct tape the pieces together so they fit snuggly. Cut off any excess plastic off. Repeat with the other thigh.
- Glue com-unit onto the right side of the front chest plate.
HIPS & NECK:
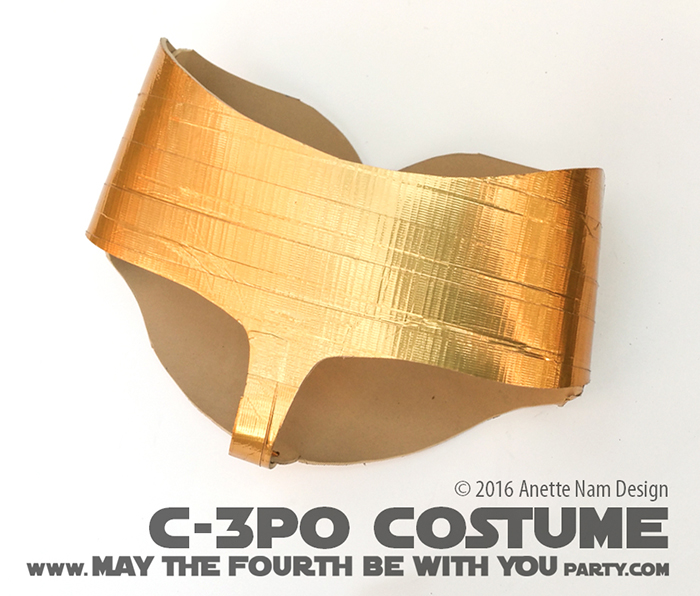

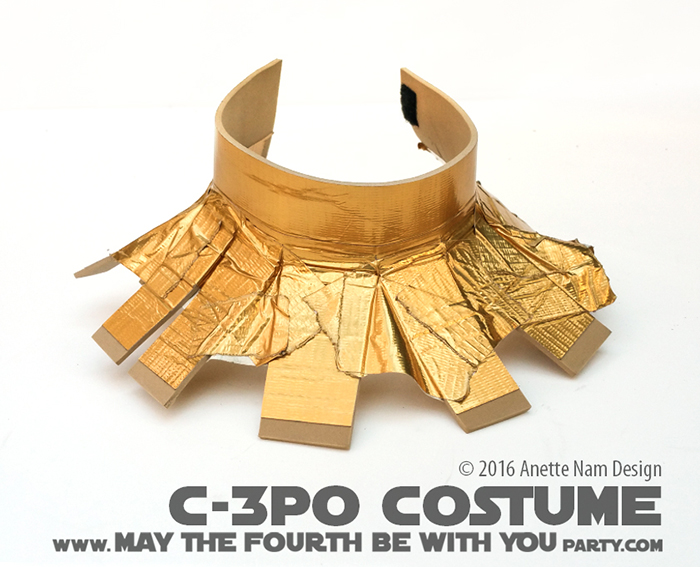
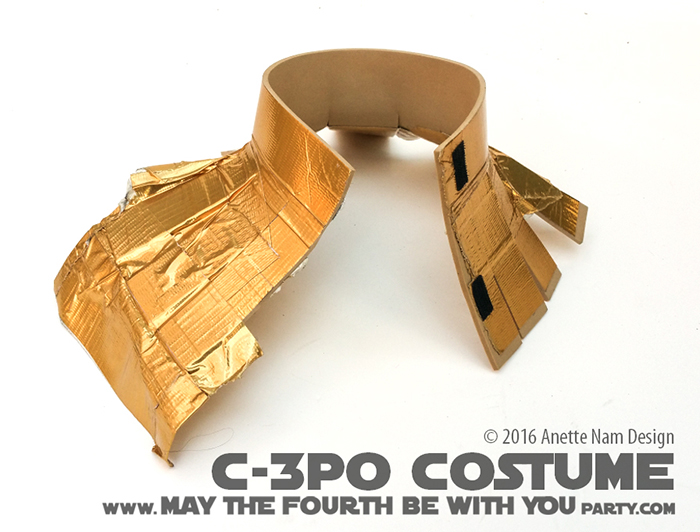
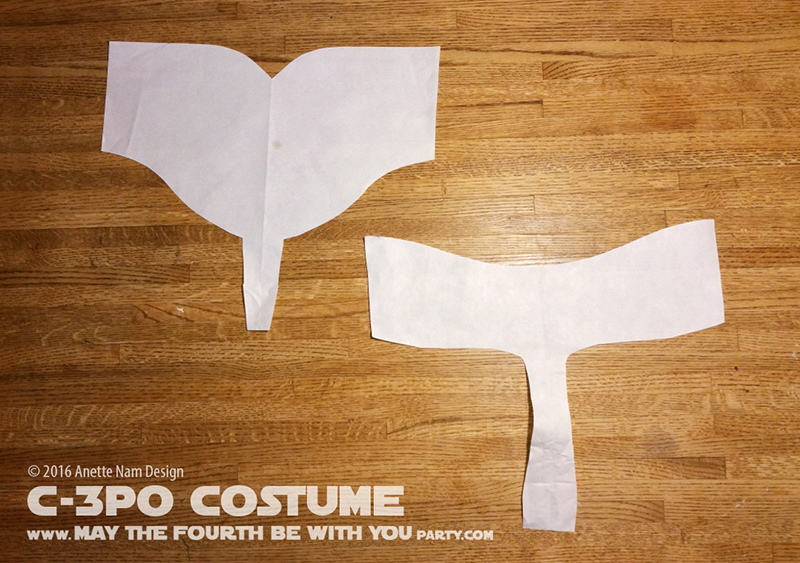
- Using large pieces of paper, make patterns for the hip and neck pieces.
(You can download, size, and print out the picture of below if you want) - Try the paper pieces on and make any adjustments.
- Trace the patterns on 1/4″ beige craft foam.
- Cover the other side of the foam with gold Duct Tape. Make sure to overlap each strip a bit.
- Cut out with an X-acto on self-healing mat.
- I used gold Duct Tape to close the hips (or the “diaper” as my kids call it) and used velcro strips for the neck.

HAIR:
Since #1 has long hair, we made braids and pinned them to the top of her head so they mimicked the “ridge” around C-3PO’s head. Then we used gold hair color spray to get a nice shimmer.


Tips:
Gold Duct Tape RULES! It is strong, flexible and can fix just about any on-the-spot wardrobe malfunction.
The Foam/Duct Tape combo is fantastic. It is strong, durable, flexible and the shape bounces back if you bend/sit. If I did this over again, i would skip the soda bottles, and make more parts of the duct tape-covered foam.
I had some problems with my glue selections, so I don’t want to recommend those types of glues. I’ll do some research and will add recos at a later date.
Get Supplies:
- Gold Fabric
- Black T-shirt
- C-3PO Mask
- Tall Boots
- Gold Satin Gloves
- Robot Chest Plate
- Knight Forearm Guards
- Beige Craft Foam
- Gold or Beige Thread
- Black Thread
- Gold Elastic Cord
- Large Beads
- Elastic
- Gold Duct Tape
- Gold Metallic Spray Paint
- Silver Metallic Spray Paint
- Grey Primer Spray Paint
- Brown Primer Spray Paint
- Temporary Gold Hair Color Spray
- Good Scissors
- Awl
- Sharpie
- Sewing Machine
- X-acto Knife
- Self-healing Cutting Mat

Pingback: These ARE the Droids I was Looking for! | May the Fourth be with You Party
Pingback: Happy Halloween! | May the Fourth be with You Party
WOW! Looks like a lot of work but the end result is so great! Totally pinning this…Thanks!!!
LikeLike
THANKS!!! Once I had figured out what to use, and where, it was pretty quick, with the exception of the electrical cords on the stomach. That was an absolute pain, and took longer then the rest of the costume combined.
FYI, you can find and follow us on Pinterest too, I post most the pictures there as well. https://www.pinterest.com/maythe4thparty/
LikeLike
This looks AMAZING!
LikeLike
I’m so glad you like it! We really had so much fun planning and putting it all together. As we were making it, we realized a lot of the same parts would work great for a stormtrooper costume too. So we bought extra forearm guards and chest plates, just in case we ever “need” to make Finn 🙂
LikeLiked by 1 person
WOW! That is just fantastic! I think you definitely need to go for Finn next…
LikeLike
Thank you SO much! I am really really hoping for Finn next year. For this year, the kids have already made me promise to make their fave’s for Halloween, so I better not break my promise.
LikeLike
Pingback: U-R2-Cute! (DIY R2-D2 Costume) | May the Fourth be with You Party
Awesome costume. With all the paint and other supplies what was your total cost?
LikeLiked by 1 person
Doing a quick calculation, I think I spent about $140 (almost a third of that was spray paint, I used 6 cans total I think) That does not include the tools or items we had around the house (such as glue or the plastic lids. Speaking of lids, I planned ahead. Knowing I was going to need them, I saved all smallish plastic containers for at least a month before we even started making the costume). I also spent countless hours looking for items to use – scavenging at dollar stores and online clearances. No one said making your own costumes was the cheaper or easier way to go – but it is by far the most fun!
LikeLike