
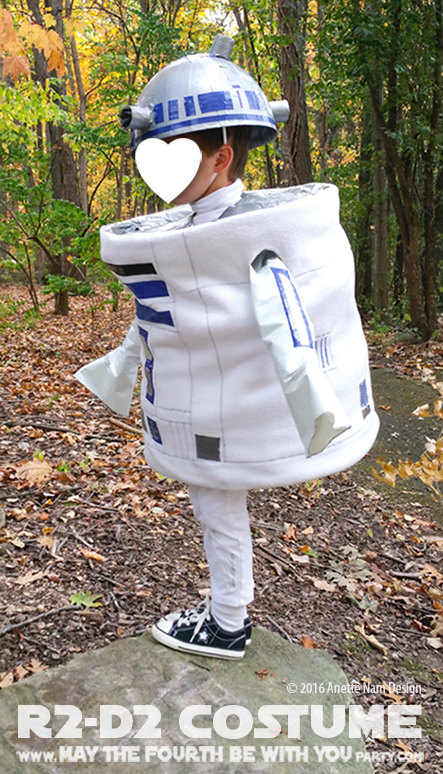
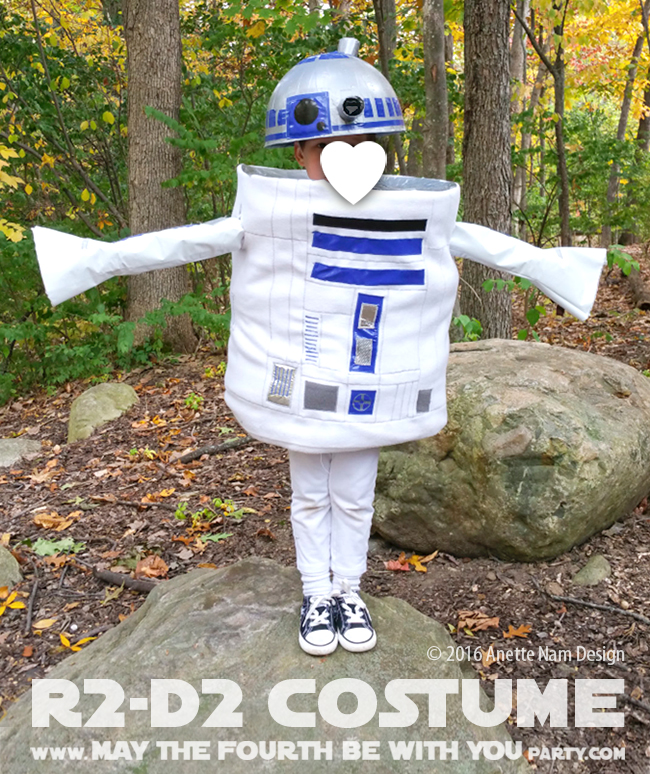
Today we have the counterpart to last week’s C-3PO costume post: R2-D2! I made it a few years back, when #1 was almost 4 years old. She wore it for 2 Halloweens, as well as a few parties, so by the time our son was ready to wear it (and we took all these photos), it had been dinged, dirtied, squished, bent, ripped and stepped on more than a few times.
But that is OK. None of our costumes start out perfect anyway. I am in absolute awe of the people who make beautiful, perfect cosplay costumes. But I neither have the skill, nor the patience for that kind of precision. Luckily, I also love costumes that are look home-made, ‘cuz I do have mad duct-taping skills!
The R2-D2 uses A LOT of duct tape, but its main feature is that the “body” is flexible, so you can get in and out of a car (ok, in and out of a van), you can sit down in it, and it is incredibly light. I have seen many very cool R2 units made from poster board, garbage cans, or simple fabric, but I wanted one that was the correct shape AND was flexible. So we made our from a pop-up net laundry hamper from IKEA.

If you want to see more pictures from the photo shoot, check these 2 posts out:
These ARE the droids I was looking for!
Happy Halloween!
And if you want to see a close up of any of the photos here, just click the photo, and a larger image should pop right up.
On a separate and very sad note (and I as you probably already know), Kenny Baker passed away this past August 13. He played R2-D2 in all the Star Wars movies, except The Force Awakens (where he was a consultant, according to Wikipedia). He will be sorely missed by all his fans!
Needed:
- Round Pop-up Laundry Hamper
(we got ours at IKEA, in 2010 I think)
- White Fleece Fabric
- Grey Fleece Fabric
- Round Plastic Serving Bowl
- White Vinyl Fabric
- Blue Vinyl Fabric
- Black Vinyl Fabric
- Silver Fabric
- Sneakers
- White Leggings
- White Turtleneck
- Paper Towel Roll
- Silver Metallic Permanent Marker
- White Electrical Tape
- Blue Electrical Tape
- Black Electrical Tape
- Gold Duct Tape
- Silver Duct Tape
- Safety Pins
- Green Upholstery Foam
- White 1/8″ Wide Elastic
- Brown Woven Ribbon
- White Thread
- Blue Thread
- Brown Thread
- Grey Thread
- Black Thread
- Good Scissors
- Needle
- Pins
- Sewing Machine
- Glue Gun
- X-acto Knife
- Self-healing Cutting Mat
- C-thru Ruler
How To:
BODY:

- Measure the height and circumference of the laundry basket.
- Fold the white fleece in half, then cut it a few inches taller, and wider than the basket. (Doubling the fabric makes the “quilting” look nicer)
- Add any detailing you want with grey and blue thread by quilting the white fleece layers together. I recommend first measuring and drawing the pattern on with a pencil.
Note: I did all the stitching in zig-zag so it would be visible from a distance. - Cut the decorations out of black and blue vinyl fabric, as well as the different grey and silver fabrics.
- Draw details with the silver marker on the appropriate blue pieces.
- Pin the patches in place and sew in place. (Keep in mind that the fleece will stretch. so give yourself plenty of empty white space in the back in case you need to make the fleece “tube” smaller.
- Pin (face-to-face) and sew the white fleece “tube” together. Turn right-side-out. Makes sure it fits snuggly around the laundry basket. Remove the tube while you make the other adjustments to the basket.
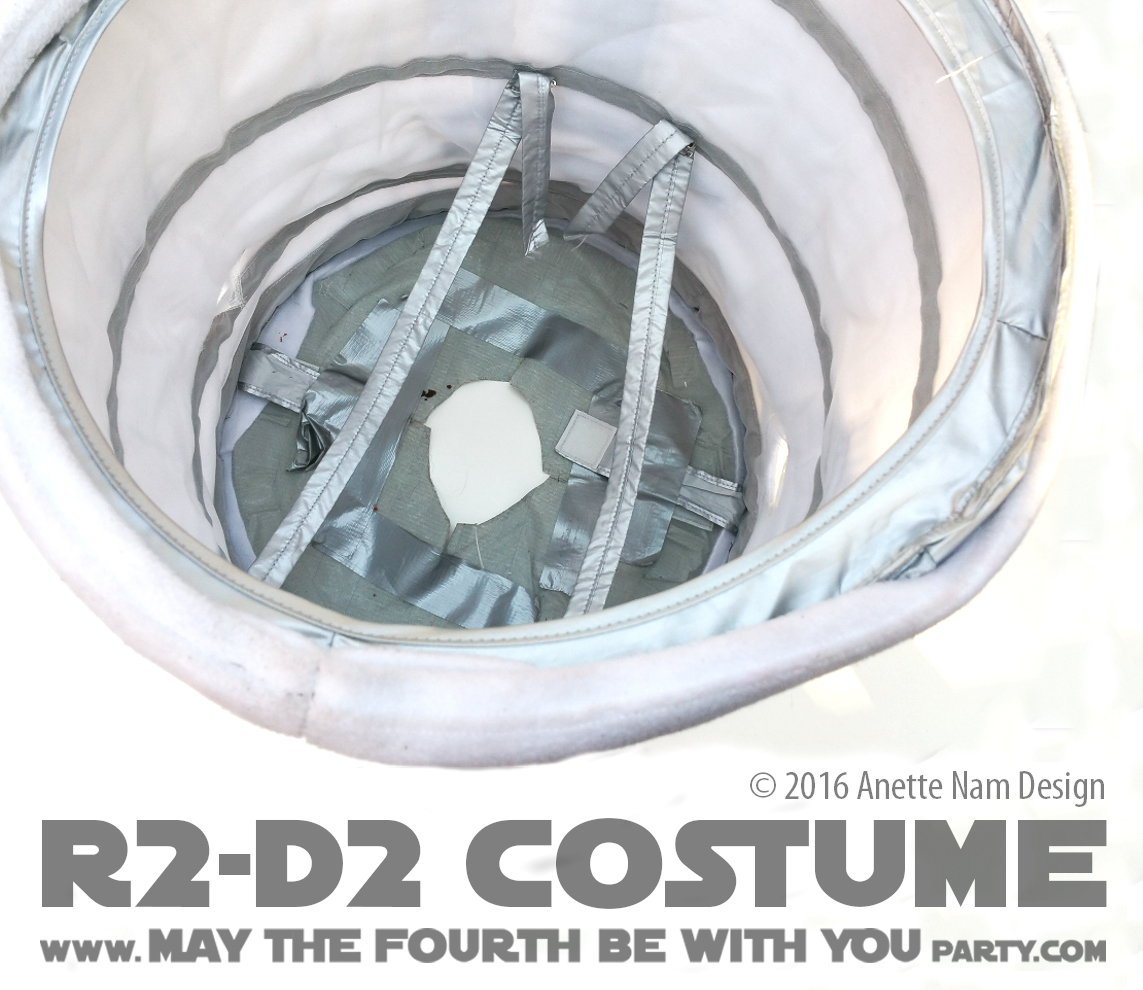
- Cut a hole for the head on the bottom netting of the basket. (I will now call this the “top” of the basket)
- Cut the handles off. Make shoulder straps by sewing them to the inside of the laundry basket. The straps should rest on the shoulders, the top of the basket should not.
- Cover the rest of the top with duct tape. (make sure you finish the edges of the hole with duct tape, otherwise they will be pretty sharp)
- Cut holes for the arms in the basket.
- Put the fleece tube back on basket.
- Cut the arm holes through the fleece.
- Make sure the fleece overlaps a bit on the top of the basket, and duct tape in place.
HELMET:
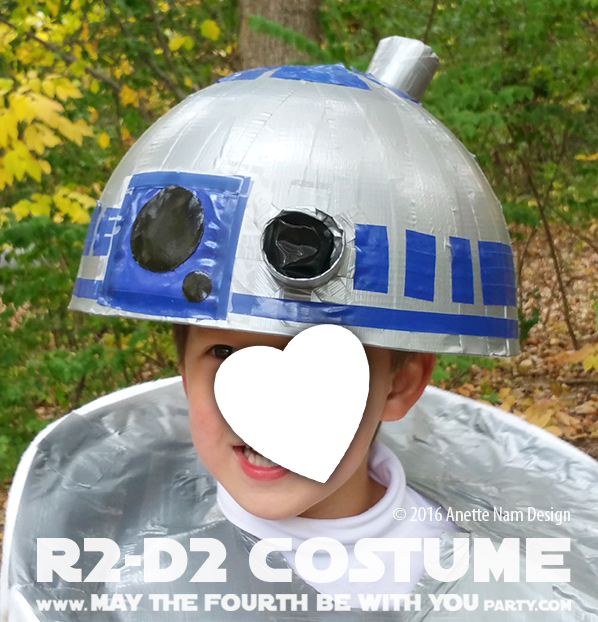
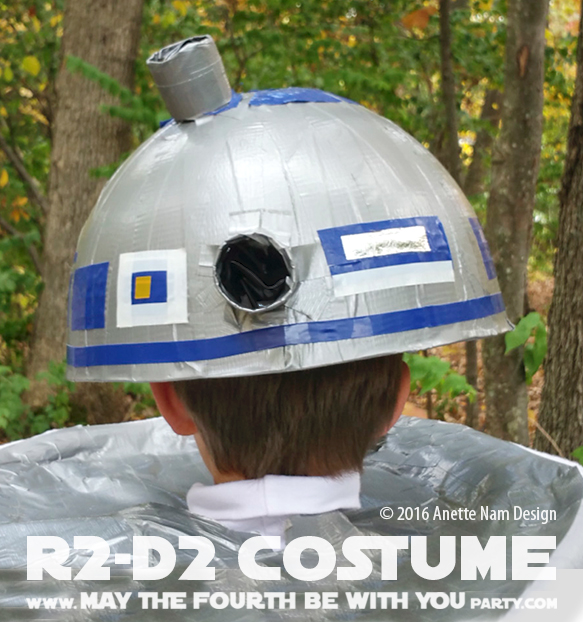
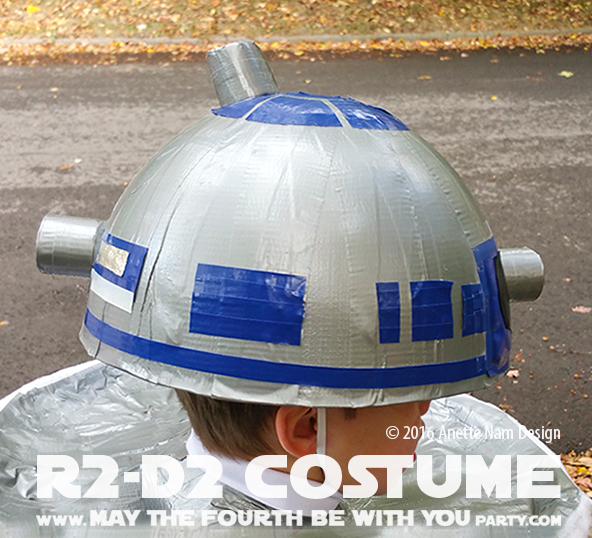
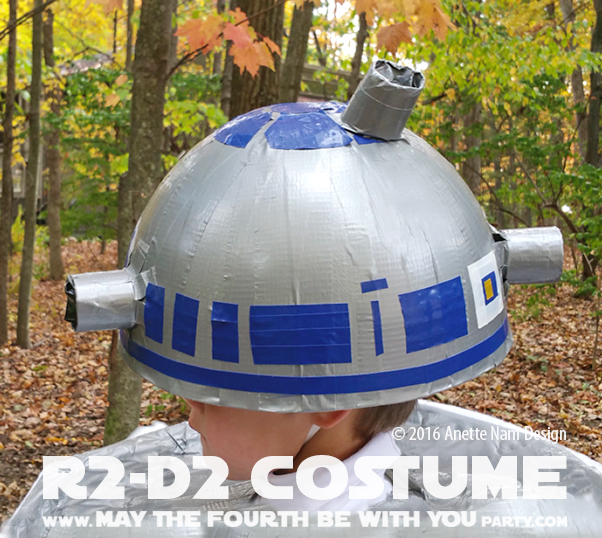

- We cut the rim off a plastic bowl we already had at home.
- Cover the bowl with duct tape.
- Add details in black, white and blue electrical tape + a few details in gold duct tape.
(Create any shapes you want by making tape “sheets” by layering tape on a self-healing mat, then cutting them out with an X-acto knife) - Cut paper rolls into 3 pieces of about 2.5″. Cover in silver duct tape.
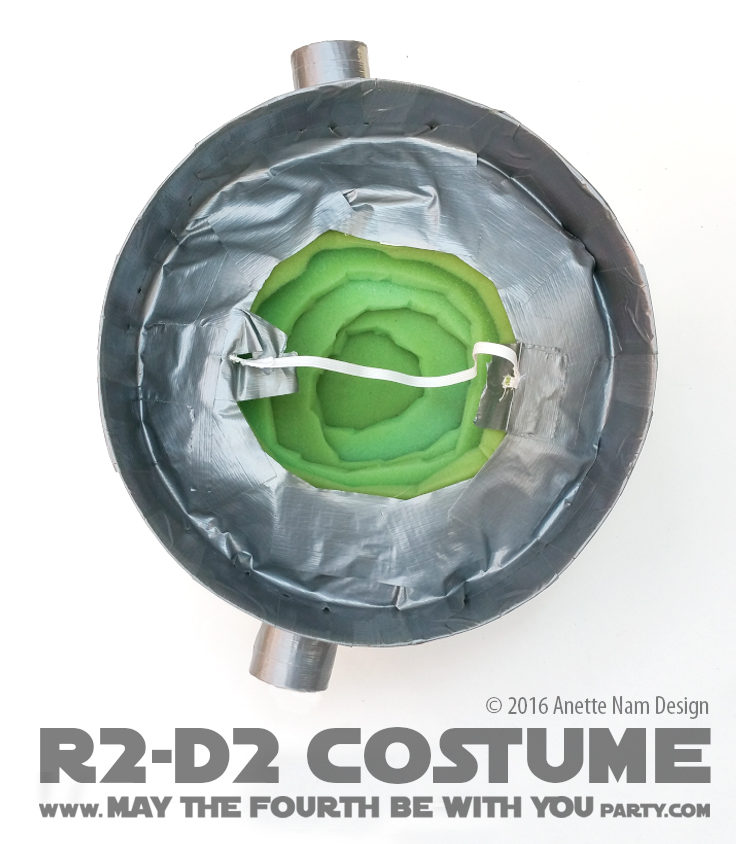
- Cut circular pieces of foam to fit in the helmet.
- Glue pieces together.
- Cut a whole in the largest piece of foam – just large enough for the head.
- Cut a smaller piece out of the next layer. Repeat until the foam semi-circle fit well on the head.
- Glue foam into inside of helmet.
- Cover the inside with duct tape.
- Sew elastic to the foam, to be used as chin-strap.
- Duct tape paper towel rolls to the outside.
- Cut small pieces of black vinyl, fold and glue inside the paper towel rolls.
ARMS:
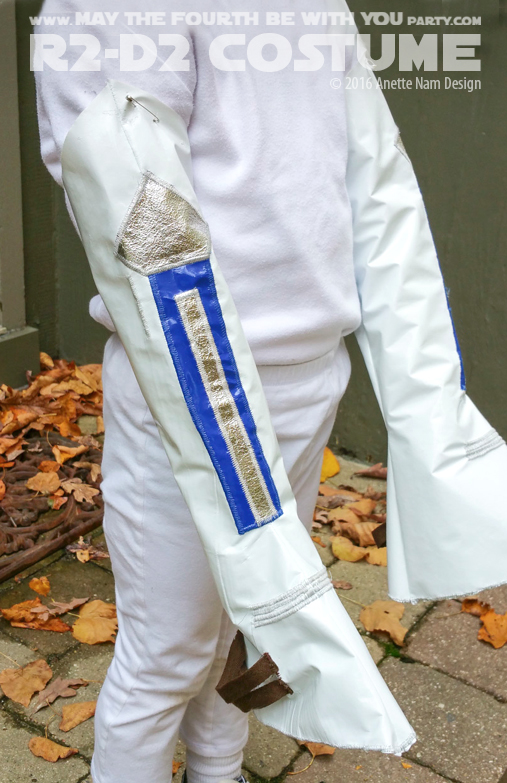
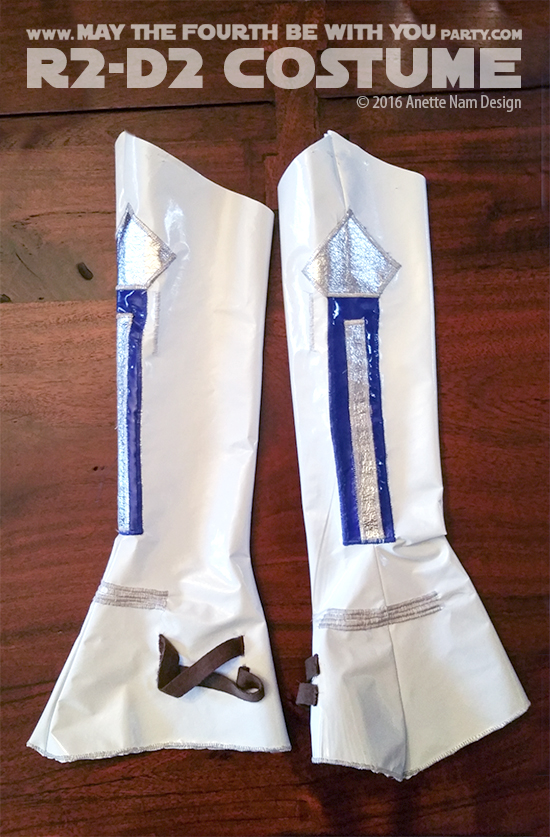
- Cut the arms out of white vinyl fabric.
- Pin sleeves (face-to-face) and sew closed. Turn right-side-out.
- Cut and sew on blue and silver embellishments.
- Sew (with zig-zag) any joints or lines you want to add.
- Add brown ribbon details by hand.
- The sleeves will be safely pinned to the sleeves of the turtle neck.
Tips:
Make sure you use a white turtleneck, not a t-shirt. The edges of the hole for the head in the laundry basket might be sharp and uncomfortable, so you want to make sure you cover the neck.

Movie screen shot © LucasFilm Ltd. via http://www.mirror.co.uk
Want to know how we made the C-3PO DIY instructions? Click here for the DIY post.
Get Supplies:
- Round Pop-up Laundry Hamper
- White Fleece Fabric
- Grey Fleece Fabric
- Round Plastic Serving Bowl
- White Vinyl Fabric
- Blue Vinyl Fabric
- Black Vinyl Fabric
- Silver Fabric
- White Leggings
- White Turtleneck
- Silver Metallic Permanent Marker
- White Electrical Tape
- Blue Electrical Tape
- Black Electrical Tape
- Gold Duct Tape
- Silver Duct Tape
- Safety Pins
- Green Upholstery Foam
- White 1/8″ Wide Elastic
- Brown Woven Ribbon
- White Thread
- Blue Thread
- Brown Thread
- Grey Thread
- Black Thread
- Good Scissors
- Sewing Machine
- Glue Gun
- X-acto Knife
- Self-healing Cutting Mat
- C-thru Ruler

Pingback: Gold Winner! (DIY C-3PO Costume) | May the Fourth be with You Party
Pingback: These ARE the Droids I was Looking for! | May the Fourth be with You Party
Pingback: Happy Halloween! | May the Fourth be with You Party
This is absolutely adorable, and so creative! I love R2-D2, and this is honestly probably one of my favorite interpretations for a costume, especially for a child.
LikeLike
What a nice compliment, THANK YOU! I was dragging my feet making this post. If you read the post These are the Droids I was looking for I talk a bit about having a hard time conceiving our second child. This costume was made for my daughter as I was recovering from one of my miscarriages. It was therapy. It was fun, and it got me something else to think about while I was having a really tough time. So I always had mixed feelings when I saw the costume. But now, seeing my funny, energetic and totally geeky son wear it too, well, you can imagine that my heart just does a little dance of joy, and I THANK GOD for the blessing.
LikeLike
I want one for myself! I love this.
LikeLike
Thanks so much! And I would have to say one is NEVER EVER too old to dress up in a laundry basket and a duct taped salad bowl 🙂
LikeLike
Pingback: Leia + Yoda 4-Ever (DIY Leia Costume) | May the Fourth be with You Party