Sometimes I really do miss the pre-CGI days! We just watched Empire Strikes Back (to get inspired when making our Halloween costumes, which will be posted soon!), and we marveled at how amazing the big battle on Hoth still looks…almost 25 years later. My favorite part is watching the Walkers. When watching, I could feel the weight of those walkers. I could feel the creaking in their knee-joints. Stop motion filming adds weight, gravity and substance in a way that CGI just can’t.
Speaking of enjoying low-tech, things that are made painstakingly by hand, one tiny step at a time….. Here is
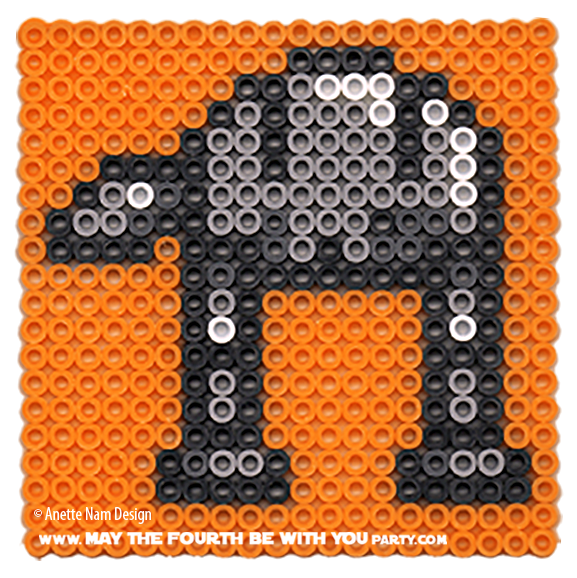
#2 in the Perler bead/cross-stitch/Lego/pixel/mosaic series.
Needed:
- Perler Beads (Black
, White
,
Orange
, Dark Grey
, (Light) Grey
- Tweezers (optional)
- Perler Clear Pegboards
- Removable Tape
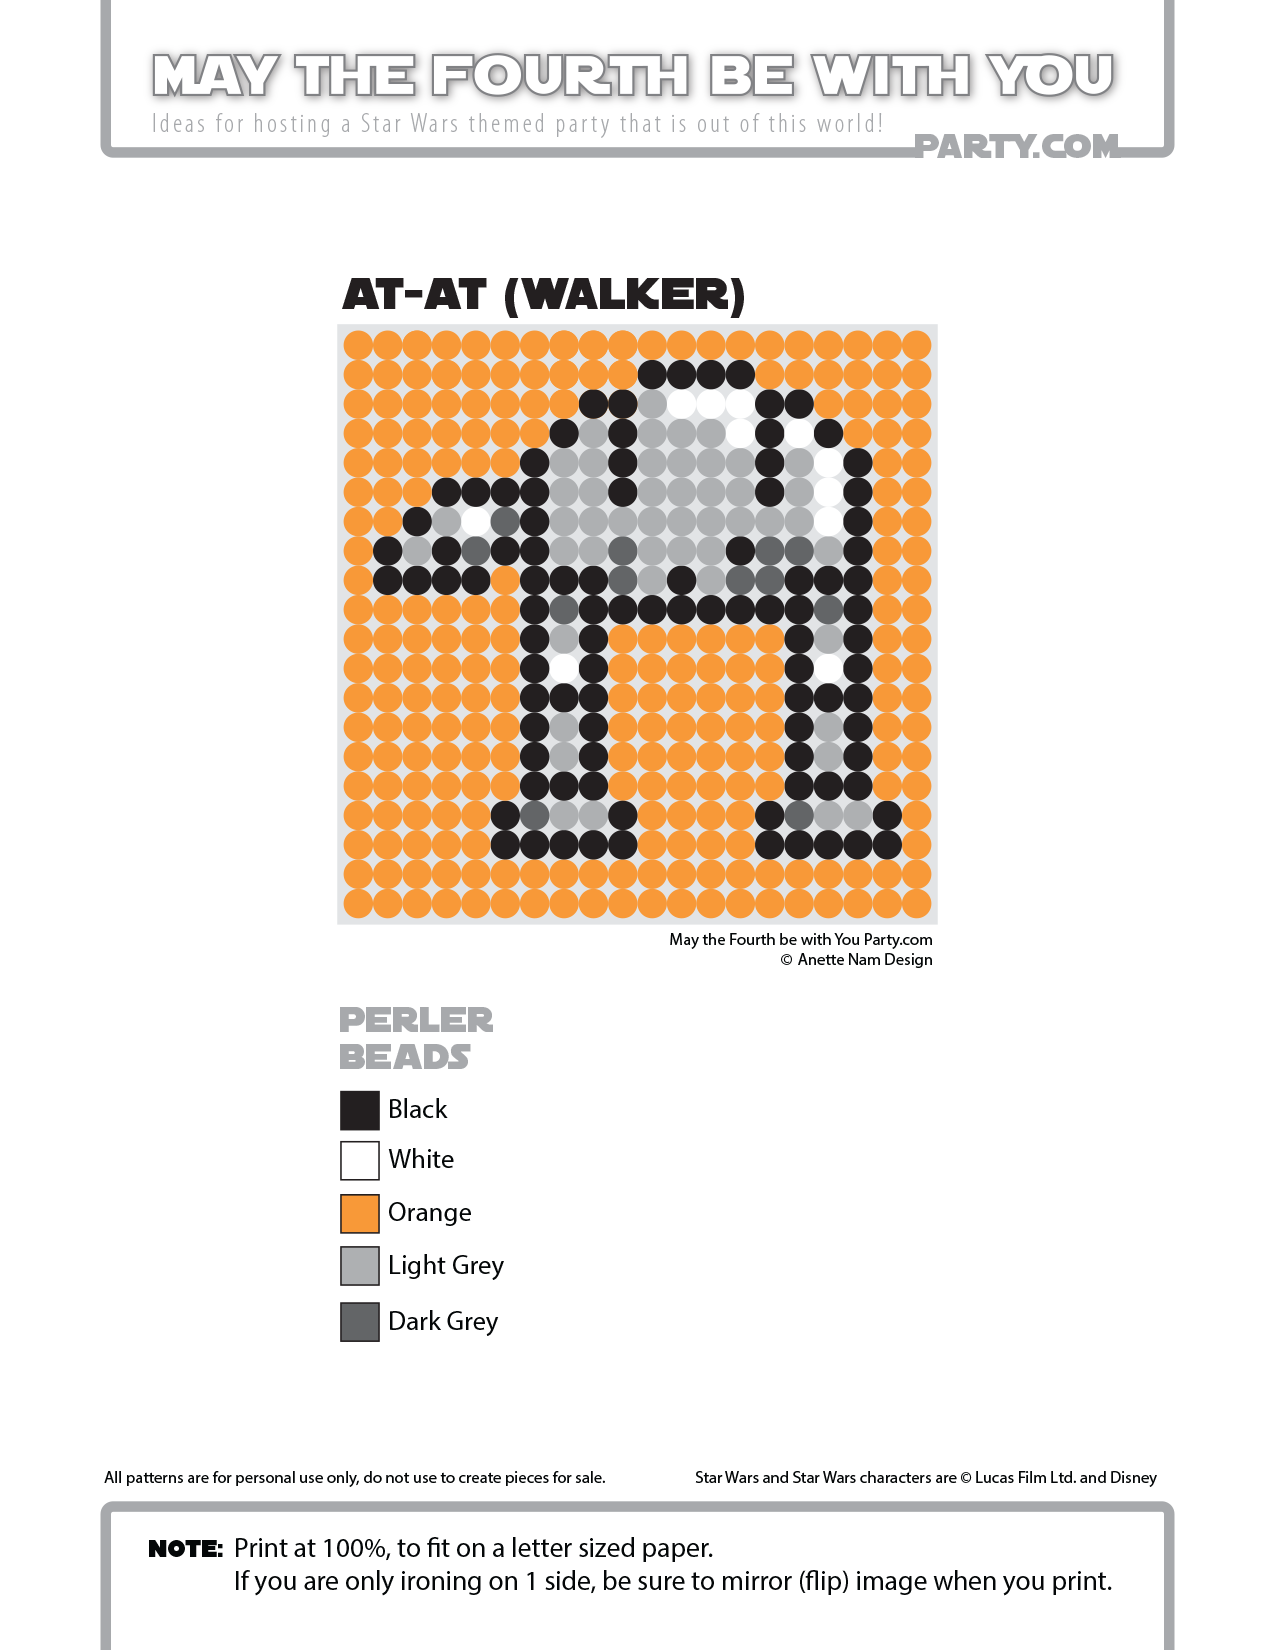
- Printout of Pattern (download above image)
- Iron
- Baking Parchment Paper (Perler Ironing Paper
)
- Heavy Object with Flat Bottom
- Cork sheets with Adhesive Backs
- Scissors or X-acto Knife
- Glass
- Bantha Milk (optional)
How To:
- Download and print out the pattern provided (mirror it, if you only plan on ironing on only 1 side).
- Cut out, then tape pattern to the back of the Perler Pegboard so the dots line up with the pegs.
- Add the Perler beads (tweezers are pretty handy if you don’t have a 6 yr old’s tiny fingers).
- Carefully move pegboard to ironing board, place parchment (or Perler ironing paper) on top.
- Iron until the beads start melting together (If you have never done this before, it might take some practice to get it “just right”).
- Let cool for a bit, remove from Perler Pegboard and remove paper.
- Optional: turn over, cover with parchment paper and iron on other side. (put something solid and heatproof underneath to make ironing easier)
- If you only iron on 1 side, place it under something flat and heavy while it cools, to avoid curving.
- Cut cork about 1/4” smaller than the square, affix to the back.
- Don’t forget the Bantha milk. Enjoy!
Tips:
Usually people iron on both sides of the Perler bead design, but I prefer to only do the back. The designs look crisper and more “pixely”. With the cork on the back, I have not had any problems with the coasters falling apart, but feel free to iron yours on both sides.
Note, if you only plan on iron on only 1 side, you need to mirror the pattern.
Also, the coasters are pretty hard to clean, so try not to get anything too gunky in there.
Get Supplies:
Perler Beads 1,000 Count-Black
Perler Beads 1,000 Count-White
Perler Beads 1000 Count-Orange
Perler Beads 1,000 Count-Dark Grey
Perler Beads 1,000 Count-Grey (Light Grey)
Perler Beads Clear Square Pegboards 4 Pack
Perler Fun Fusion Ironing Paper 6/Pkg-
Darice Adhesive Backed Cork Tiles (This is a bit thicker than what I used, but I can’t find the same kind I got)
Note:
Feel free to use these patterns for any personal use – but please do not sell items made with them. Also, feel free to link to this blog so others can download the pattern, but do not download and then re-upload in order to offer them as downloads on your own site/blog. THANKS!
