
Without a good holster, your blaster might get stuck, and then Greedo will shoot first…and we all know how terrible THAT would be. (DON’T get me started!)
With the exception of the holster, Han Solo’s costume was probably the simplest Star Wars costume we have made to date. It was done in a just a few hours. The holster on the other hand took some tinkering – but worth it, it is what makes Han’s costume cool!

(The How-to for the Han Solo costume can be found here)
Need:
- Brown Pleather
- Brown Thread
- 5 mm Foam Sheets
- Grey Primer Spray Paint
- Silver Spray Paint
- Silver Brads
- Swivel Hooks
- D Rings
(or Purse Tabs, with fabric tabs if you can find them)
- Glue Gun
- Assorted Plates
- Awl
- Good Scissors
- Self Healing Cutting Mat
- X-acto
- C Through Ruler
- Sewing Machine
How To:
Belt:

- Cut the foam shapes. (2 buckles, 3 small + 1 large cartridges)
- Spray paint with grey primer. Let dry. Turn to other side and repeat. Let dry.
- Spray with silver paint. Let dry. Turn to other side and repeat. Let dry.
- Cut a pleather strip 1.5″ wide and long enough to wrap around the waist one and a half times. (ours was 32″ for a 2.5 yr old)
- Cut another pleather strip: same width and about 5″ long (for the cartridge holder).
- Cut 1 more strip, About 1″ wide and long enough to completely wrap around the width of the belt (3.5″ in our case).
- Wrap the belt (the long strip) around Han and add velcro tabs as closures on both ends (one set in front and one in back ). (FYI, we made it wrap-around to make the holster-side sturdier, and to make the belt sizable.)
- Mark where the brads, straps and cartridges holders should go.
- Take the belt off, punch holes for the decorative brads and cartridges holders (re-enforce with glue as needed).
- Once the holster is done, get Han again, put the belt on, and mark where the swivel hooks (that will attach to the holster) should go.
- Sew hooks on, (on the back side) by hand.
- Attach the holster to the hooks..
- Once again, get Han to put on the belt. Add velcro tabs to the buckles, and add one in front and one in back of the belt to attach the buckles.
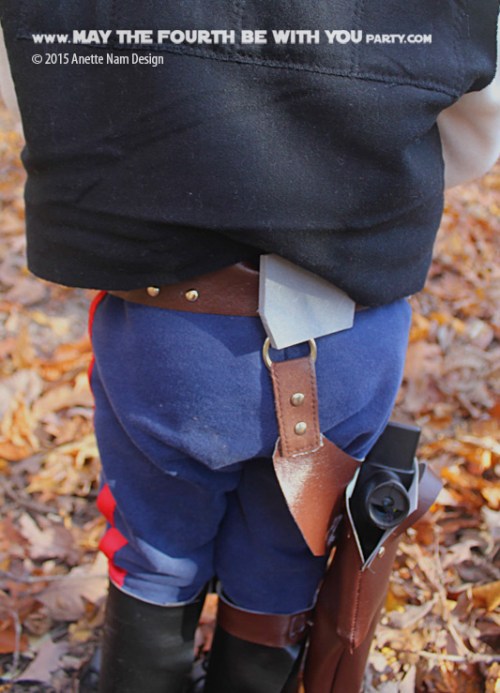
Holster:


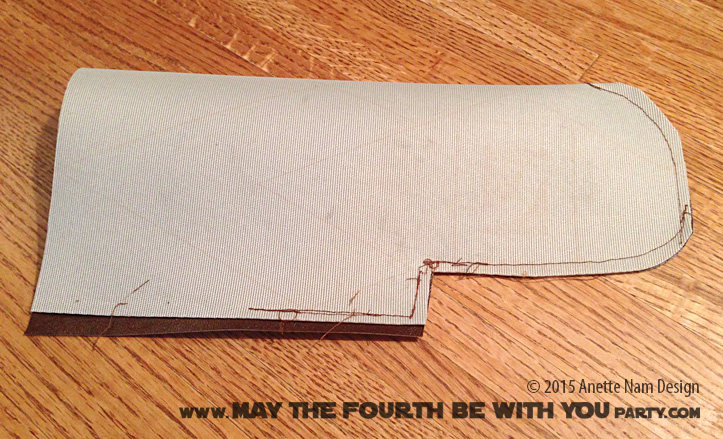
- Using 2 different sized plates as the template, cut a crescent shape of the pleather for the holster.
- Fold pleather. Using your blaster as a template, cut the holster to size.
- Sew together, face-to-face. Turn right side out.
- Cut 2 pleather strips. One long enough to wrap around the thigh (+2″). Plus, another about .75″ x 4.5″ as decoration on the holster.
- Punch 2 small holes in the holster and the small strip, attach with brads.
- Do the same on the back of the holster for the strap around the thigh.
- Then do the same again on the back and the crescent that will hold the belt to the strap.
- Glue all 3 pieces in place for extra hold.
- Add self adhesive velcro tabs as closures on the ends of the thigh strap.
- Glue fabric tabs with D rings to the 2 ends of the crescent. (If you can’t find these, you can simply sew D rings on the ends)
- Attach to the belt!


Tips:
Make sure you get a fake leather with brown or black backing. I used the light grey, and I am sure a darker back would have looked better.
I was able to find D Rings already attached to the brown fabric (called Purse Tabs), which matched perfectly with the pleather. If you can’t find them, you can easily make your own with pleather and brads and a couple of D rings.
This costume was made for 2.5 yr old, and I have to admit that this holster did not quite hold up to the kind of abuse a 2.5 year old will inflict on it. I would suggest some extra reinforcement if you make it for such a young child. Part of the problem was the velcro tabs. The reason we used those is it made the costume more flexible in sizing – which was a lucky thing. The belt fit great in September when we made it (and it was warm), but a big growth spurt combined with a very cold Halloween night (requiring fleece sweaters and long johns), we had to make the belt a couple of inches larger on the fly.
Many communities recommend that kids and adults do not carry any weapons when Trick or Treating, and I think that is really good idea. So leave the blaster at home when you go out in public!

Pingback: Who Shot First? (DIY Han Solo Costume) | May the Fourth be with You Party