-

My #1 modeling my Yoda Hat!
- My #1 modeling my Yoda Hat!

Yoda is just over 2 feet. I am almost 6 feet. He also has some 850+ years on me, so I don’t really look much like the Master. But just like him, I do make a mean rootleaf stew, I have rebellious Padowans that I am trying to guide into responsible Jedis, and I’d like to think that I am wise…ish. So, this Yoda hat has become my favorite. It is warm and cozy for cold Halloween nights; fun, convenient and out-of-the-way while dong M4P prep; and always an ice breaker when the kids have costumed events at school. In geeky good fun, it all is!
Needed:
- Green Fleece
- Green Thread
- Quilt Batting
or Pillow Stuffing
- Needle
- Good Scissors
- Sewing Machine
- A Stretchy Hat that Fits (for Sizing)
- Willing Model
-

Inside-out Front
- Inside-out Front

-

Inside-out Back
- Inside-out Back
How To:
- Fold the fleece in 3 (you need 1 piece for the back, 2 for the front of the hat).
- Place your template hat on the fleece, and use as pattern to cut a half circle about 1/2″ larger on all sides (more if your template hat is stretchy), except the bottom, which should be 1″ longer.
(I cut my back panel a bit larger than the front, and in 2 section, to get more of a curve, but that was unnecessary I think) - To create the wrinkles in Yoda’s forehead: Pin a half circle to the back of the front piece.
- Sew the wrinkle pattern (it should look quilted).
- Place the quilted front and the back pieces face-to-face (back-side-out).
- Sew the pieces together around the curve.
- Try to see if it fits. As you can see, I made mine too large, and made another seem further in.
- Fold the bottom up about .75″ and sew a hem at the bottom edge.
- Turn hat right-side-out.
- Cut 2 sets of ears (4 triangular pieces)
- Place 2 pieces face-to-face and sew the pointy sides of the ears together. Turn right-side-out. Repeat with the other ear.
- Put some quilt padding or pillow stuffing in the ears to get a little bit of stiffness and volume.
- While someone wears the hat, fold the corners of the ears together, then pin the ears in the correct place. Make sure to keep the base of the ears slightly open.
- Sew the ears on by hand. (NOT while you model is wearing it!)

Close up of Ear
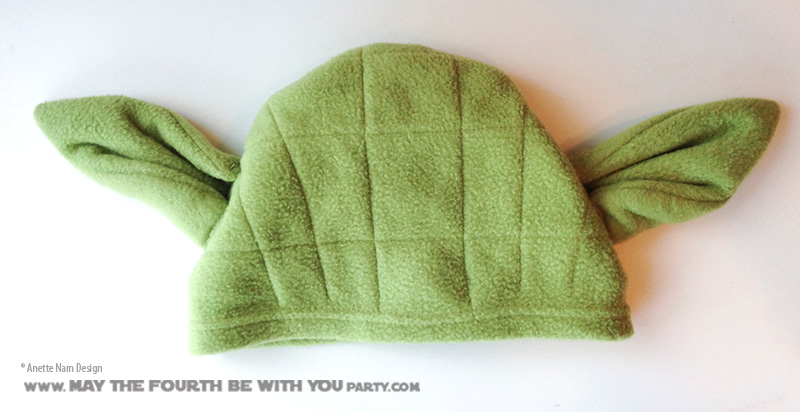
Finished hat front

Finished hat back
Tips:
I have this bad habit if not using patterns when I sew. I highly recommend making a pattern first – or at least measure to make sure things are even. I just do not have the patience for it. I know things would look nicer if I took the time to do the prep work first.
Some fleece has a front and a back side, some do not. Make sure you check so all the sides facing the right direction.
Get Supplies:
- Green Fleece
- Green Thread
- Quilt Batting
- Needle
- Gingher Scissors
- SINGER 9960 Quantum Stylist 600-Stitch Computerized Sewing Machine with Extension Table, Bonus Accessories and Hard Cover
(I don’t have that one, but a girl can dream, can’t she!)

Pingback: Cutest Yoda Ever, She Was! | May the Fourth be with You Party
Pingback: Chewbacca Perler Bead Coaster | May the Fourth be with You Party
Pingback: Silly Mommy, Tricks (-or-Treat) is for Kids! | May the Fourth be with You Party
Pingback: Do Movie Theaters Allow Tailgating? | May the Fourth be with You Party
Pingback: HAPPY HALLOWEEN! (DIY Hoth Luke on Tauntaun, and Wampa Costumes) | May the Fourth be with You Party