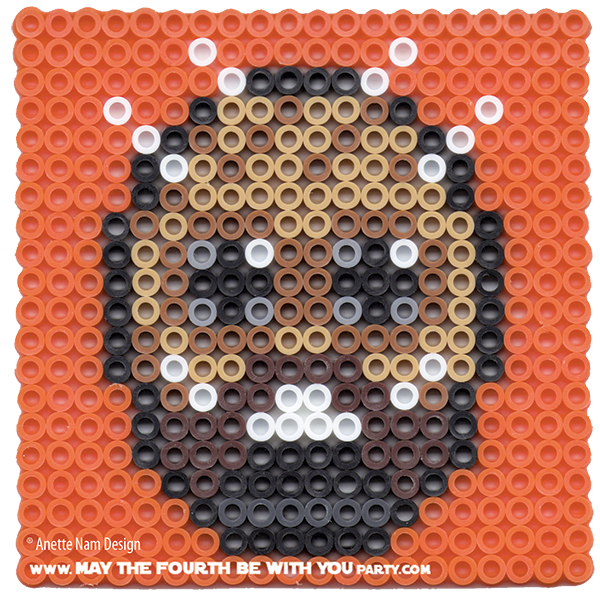
You know how you can look at something a thousand times, and still not really see it? Once of the most amazing things about creating, is that it gives you the opportunity to really see something. I obviously had seen Sand people in the movies – lots of times; we even had a Tuskan Raider family at one of our parties (fantastic costumes – post to come!), but I still was really surprised when I sat down to make the pixelated pattern for the Sand people. I simply had never noticed the intricacies of the mask. And I had no idea that they were not allowed to show any part of the skin – I had always assumed this nomadic race used them as a protection against the elements. Of all the pixel patterns, I actually think this was the most fun to make.
..and I hope you have just as much fun making #18 in the Perler bead/cross-stitch/Lego/pixel/mosaic series.
Needed:
- Perler Beads (Black,
White
- Tweezers (optional)
- Perler Clear Pegboards
- Removable Tape
- Printout of Pattern (download above image)
- Iron
- Baking Parchment Paper (Perler Ironing Paper
)
- Heavy Object with Flat Bottom
- Cork sheets with Adhesive Backs
- Scissors or X-acto Knife
- Glass
- Bantha Milk (optional)
How To:
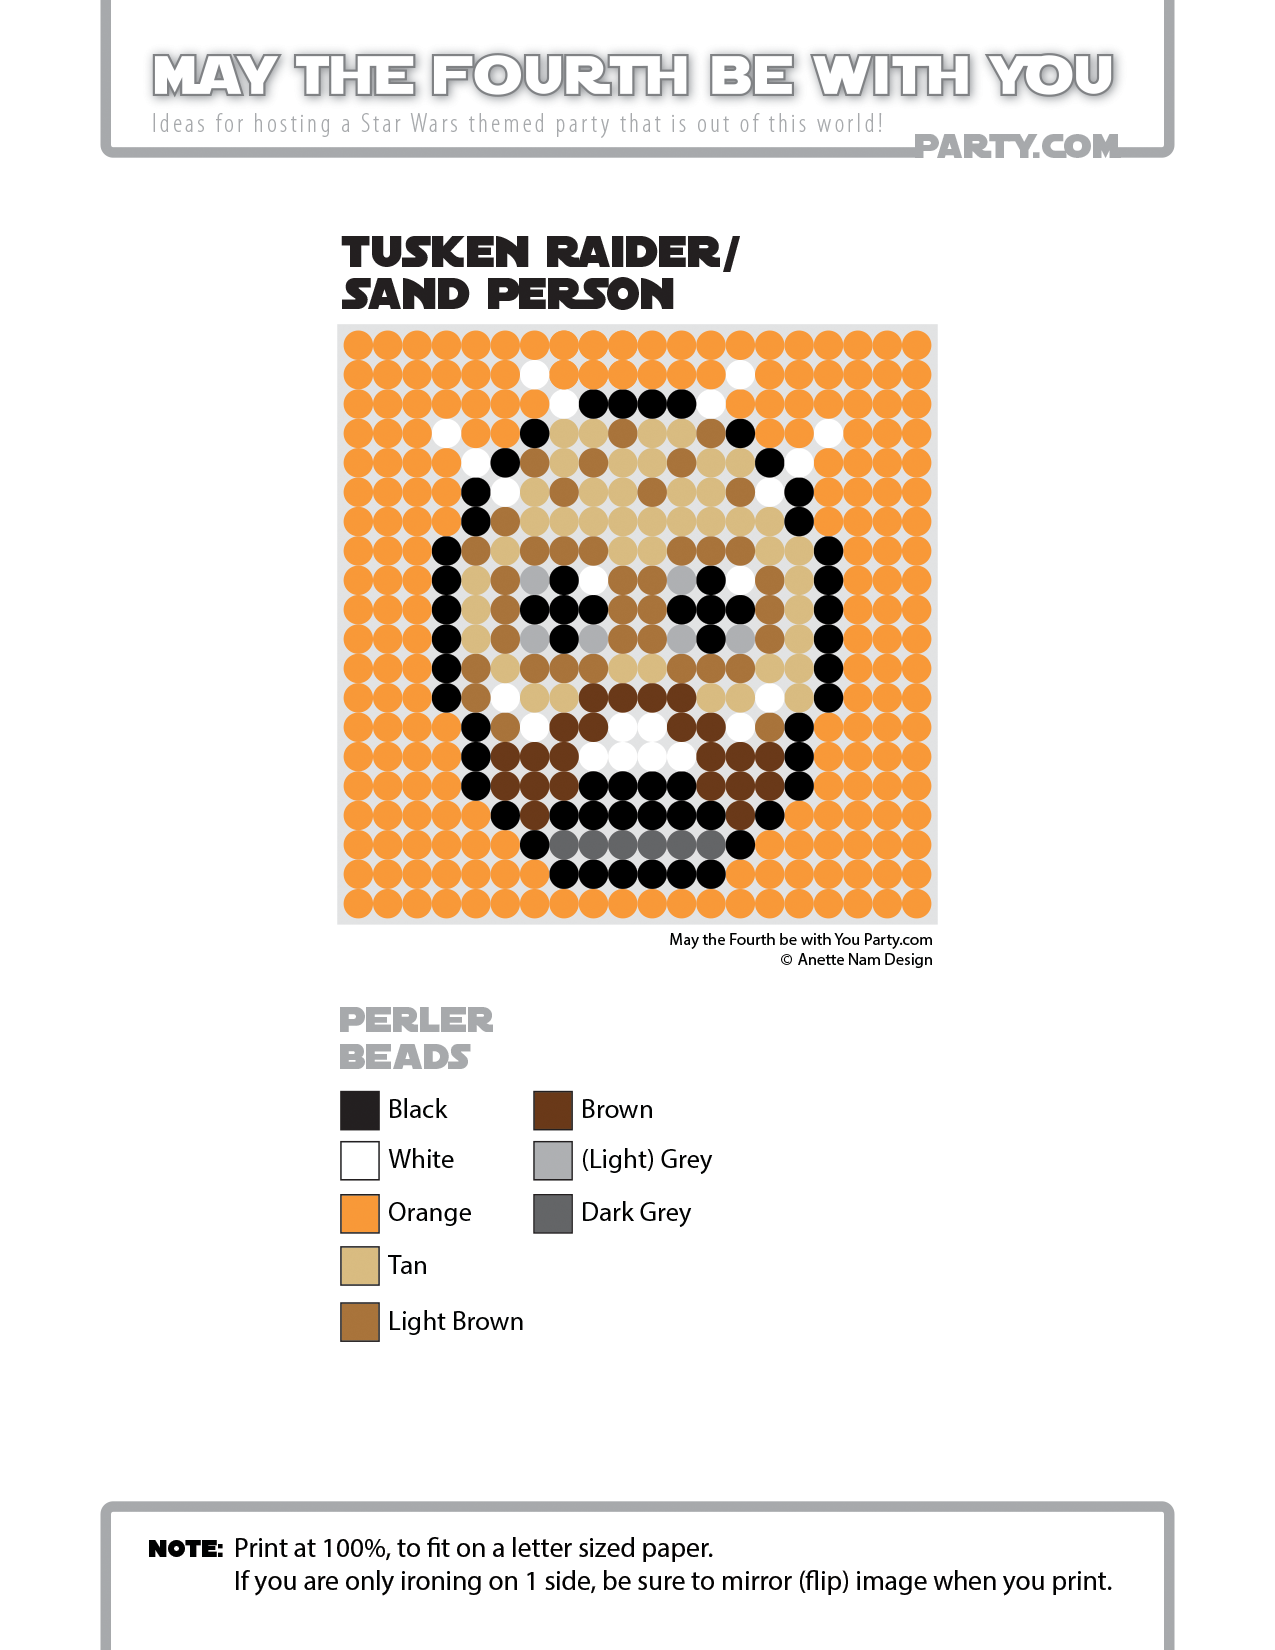
- Download and print out the pattern provided (mirror it, if you only plan on ironing on only 1 side).
- Cut out, then tape pattern to the back of the Perler Pegboard so the dots line up with the pegs.
- Add the Perler beads (tweezers are pretty handy if you don’t have a 6 yr old’s tiny fingers).
- Carefully move pegboard to ironing board, place parchment (or Perler ironing paper) on top.
- Iron until the beads start melting together (If you have never done this before, it might take some practice to get it “just right”).
- Let cool for a bit, remove from Perler Pegboard and remove paper.
- Optional: turn over, cover with parchment paper and iron on other side. (put something solid and heatproof underneath to make ironing easier)
- If you only iron on 1 side, place it under something flat and heavy while it cools, to avoid curving.
- Cut cork about 1/4” smaller than the square, affix to the back.
- Don’t forget the Bantha Milk. Enjoy!
Tips:
Usually people iron on both sides of the Perler bead design, but I prefer to only do the back. The designs look crisper and more “pixely”. With the cork on the back, I have not had any problems with the coasters falling apart, but feel free to iron yours on both sides.
Note, if you only plan on iron on only 1 side, you need to mirror the pattern.
Also, the coasters are pretty hard to clean, so try not to get anything too gunky in there.
Get Supplies:
Perler Beads – Black
Perler Beads – White
Perler Beads – Orange
Perler Beads – Tan
Perler Beads – Light Brown
Perler Beads – Brown
Perler Beads – (Light) Grey
Perler Beads – Dark Grey
Perler Beads Clear Square Pegboards 4 Pack
Perler Fun Fusion Ironing Paper 6/Pkg-
Darice Adhesive Backed Cork Tiles (This is a bit thicker than what I used, but I can’t find the same kind I got)
Note:
Feel free to use these patterns for any personal use – but please do not sell items made with them. Also, feel free to link to this blog so others can download the pattern, but do not download and then re-upload in order to offer them as downloads on your own site/blog. THANKS!
v2
